

Day Old Chicken Vaccine Injector
Category:
Key words:REGAL、Incubator、REGAL BFV Multi-stage Tunnel Incubator
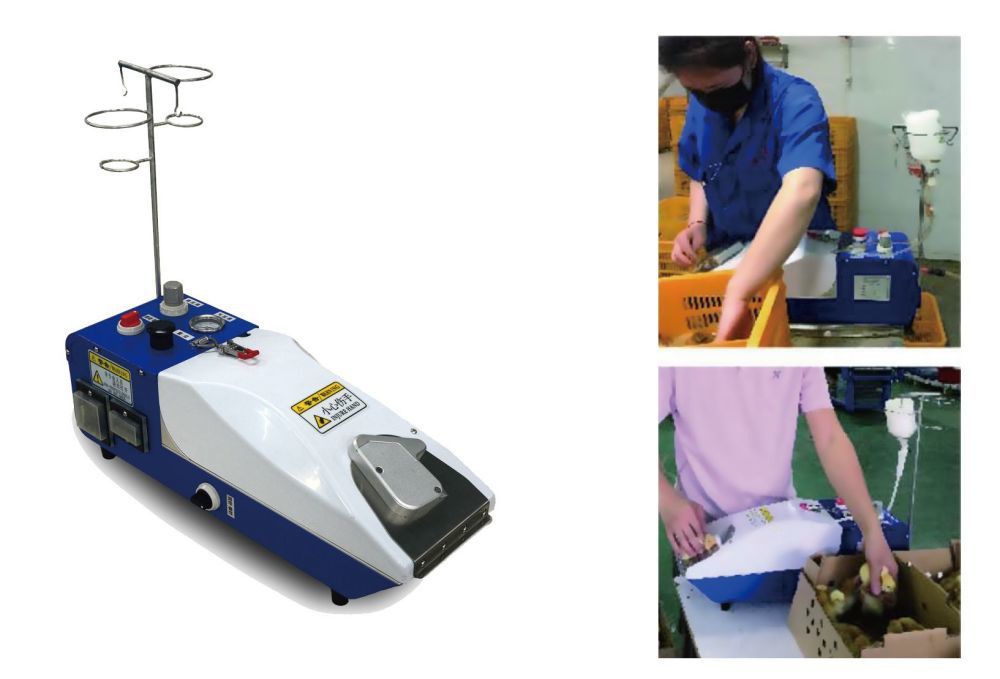
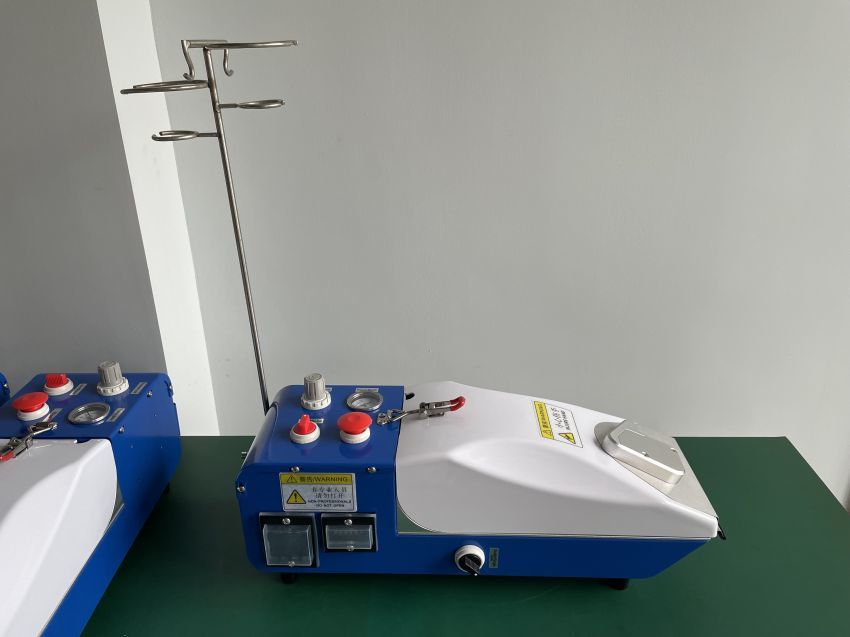
1. About the Device
Our Pneumatic Injector for day-old chicken is one of the most advanced in the field.
The device is assembled with Japanese components which ensure a smooth and trouble-free operation.
Under normal condition, our device injects 3000 to 4000 chickens per hour, much faster than traditional means.
2. Starting the Device
2.1 Make sure device is connected to the gas pumper at above 0.45Mpa to operate.
2.2 Adjust the default value, see section 4.
2.3 Check if the needle is of suitable size, see section 7 for adjustment.
2.4 Adjust injection dosage, see section 9.
2.5 After examining above, take out and disinfect the injector. Then, install injector again for usage. See section 7 for detailed information regarding installation.
3. Note to Operators
3.1 Make sure the injector is of suitable size, and is connected to the gas pumper.
3.2 Make sure all tools (injector, needle, tweezer, etc.) for injection are disinfected before usage.
3.3 Keep disinfectant away from vaccine.
3.4 Check every bottle of vaccine not surpassing expiration date. Vaccines that have been opened must not be used in the next day.
3.5 Keep vaccine away from sunlight. Perform vaccination in dry and cool areas.
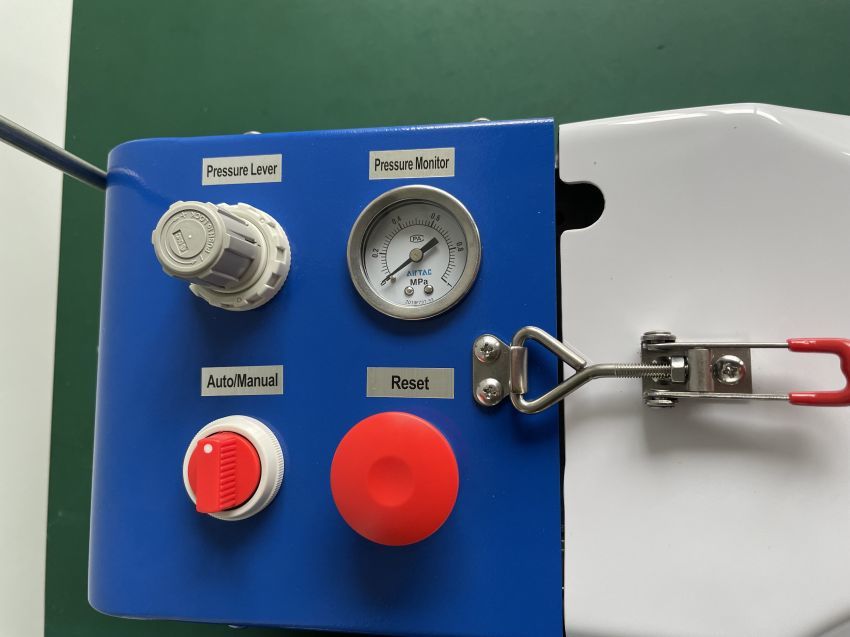
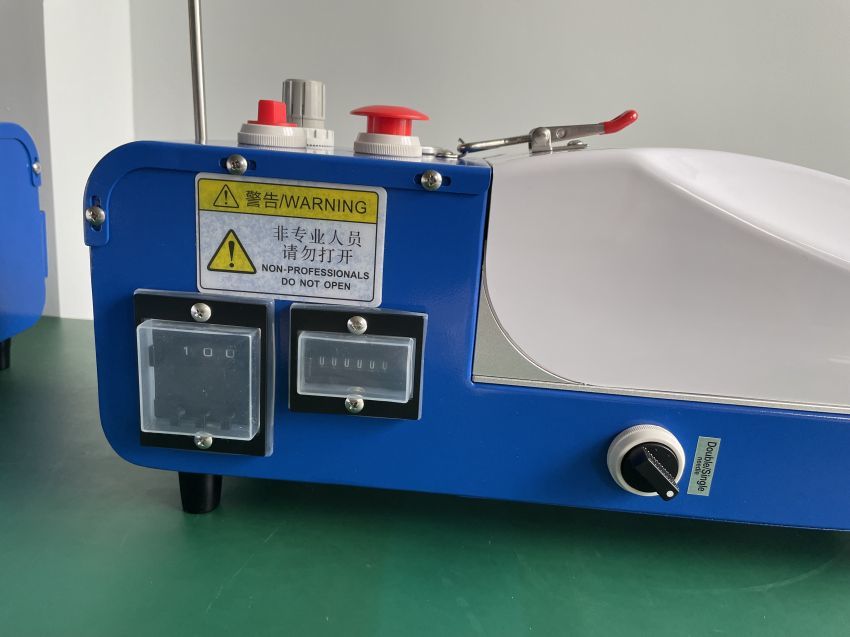
4. Control Buttons
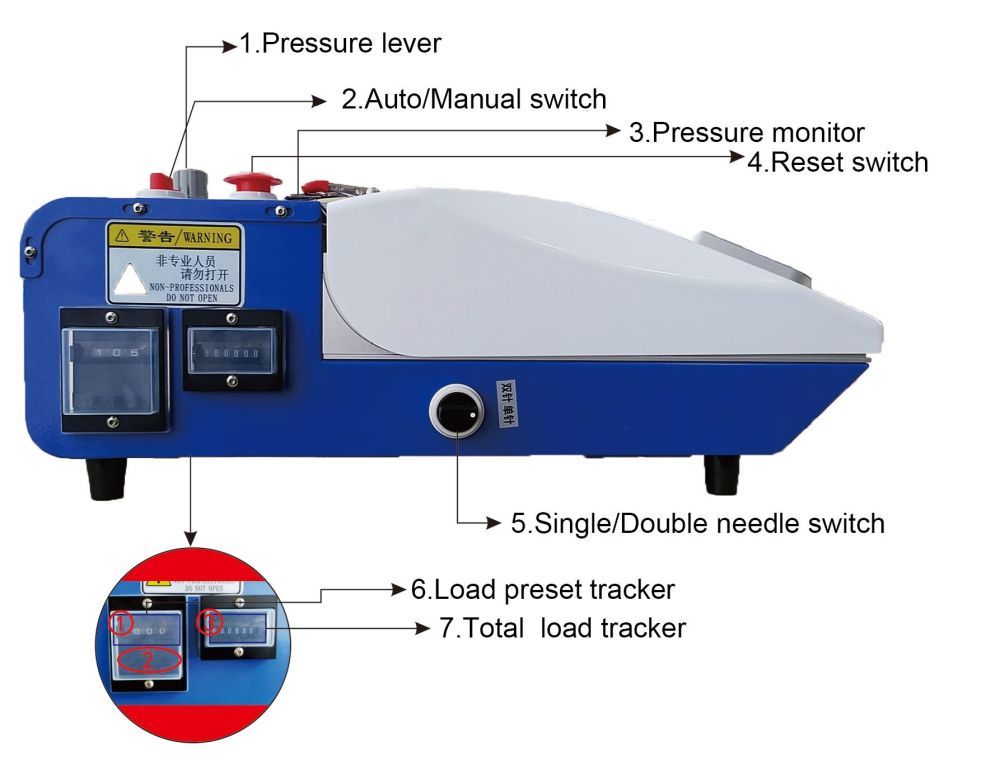
1.Pressure lever: change pressure of the device, increase pressure by switching the lever clockwise.
2.Auto/Manual Switch: switch between automatic and hand operation default to auto.
3. Pressure Monitor: track pressure of the gas pumper.
4. Reset Switch: press reset after finishing all trails.
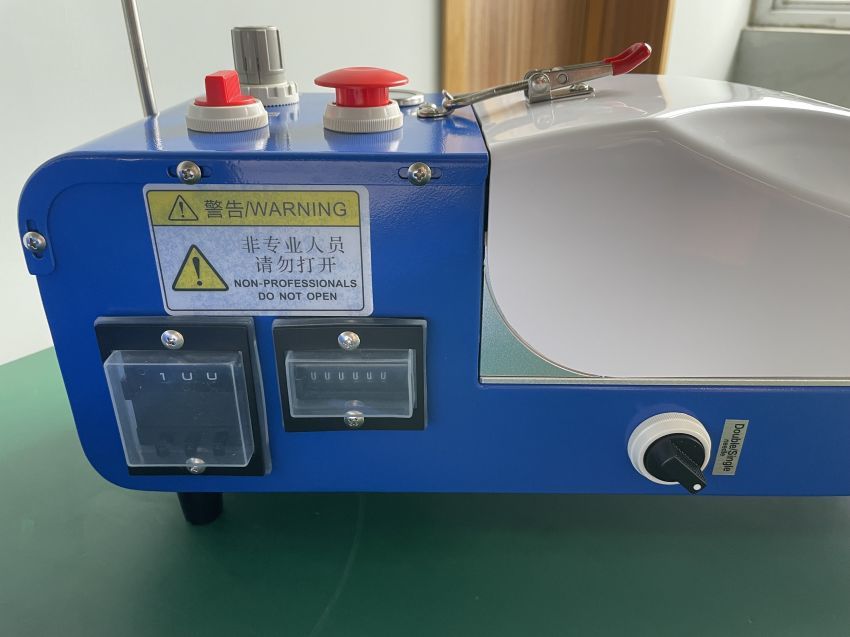
5.Single/Double needle switch: upward to single needle, downward to double needle.
6.Load preset tracker: to change desired number of trails to be performed, simply press holding ① and find the desired number with botton ②.
7.Total load tracker: showing the total number of trials performed, press ③ to reset.
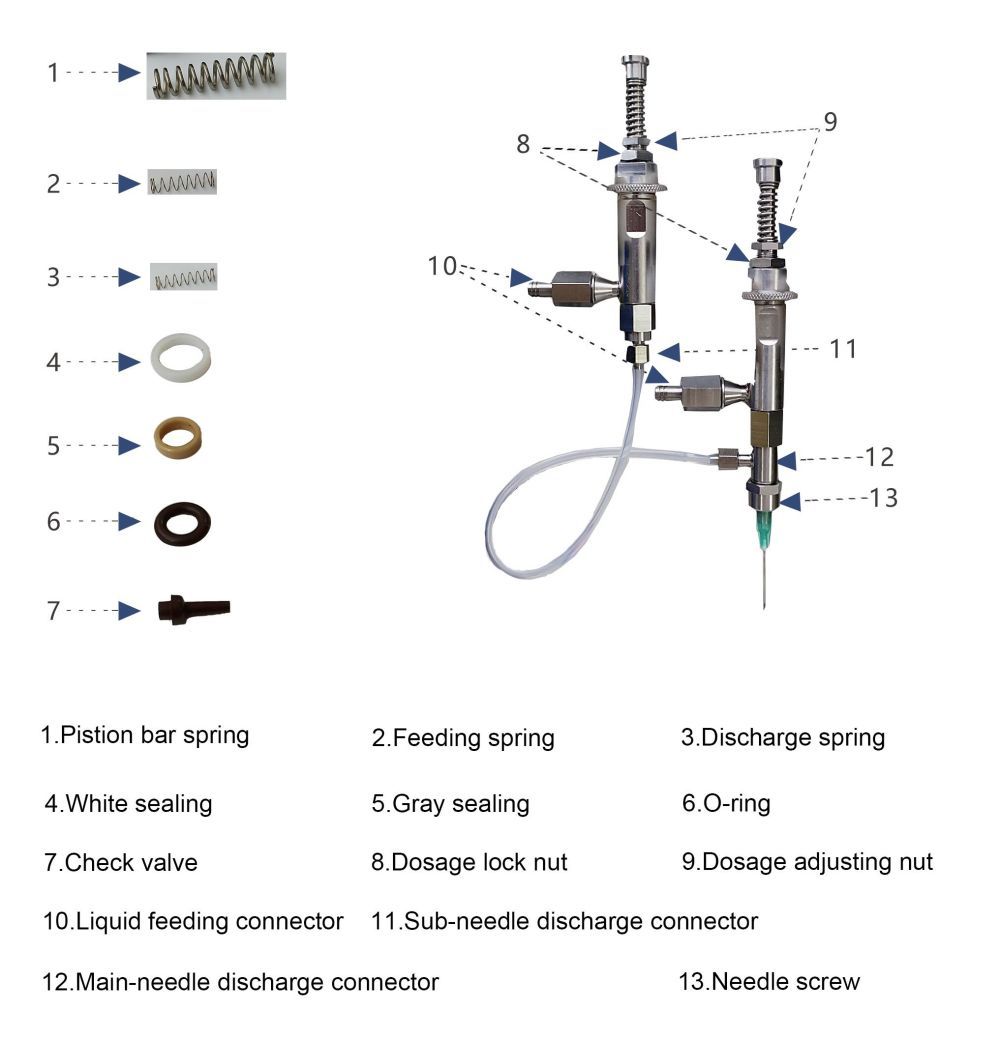
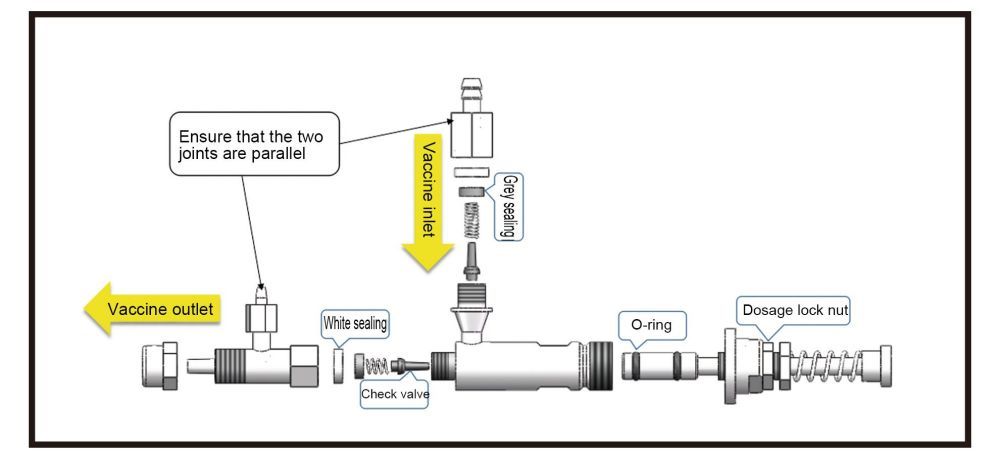
5. Injector Components
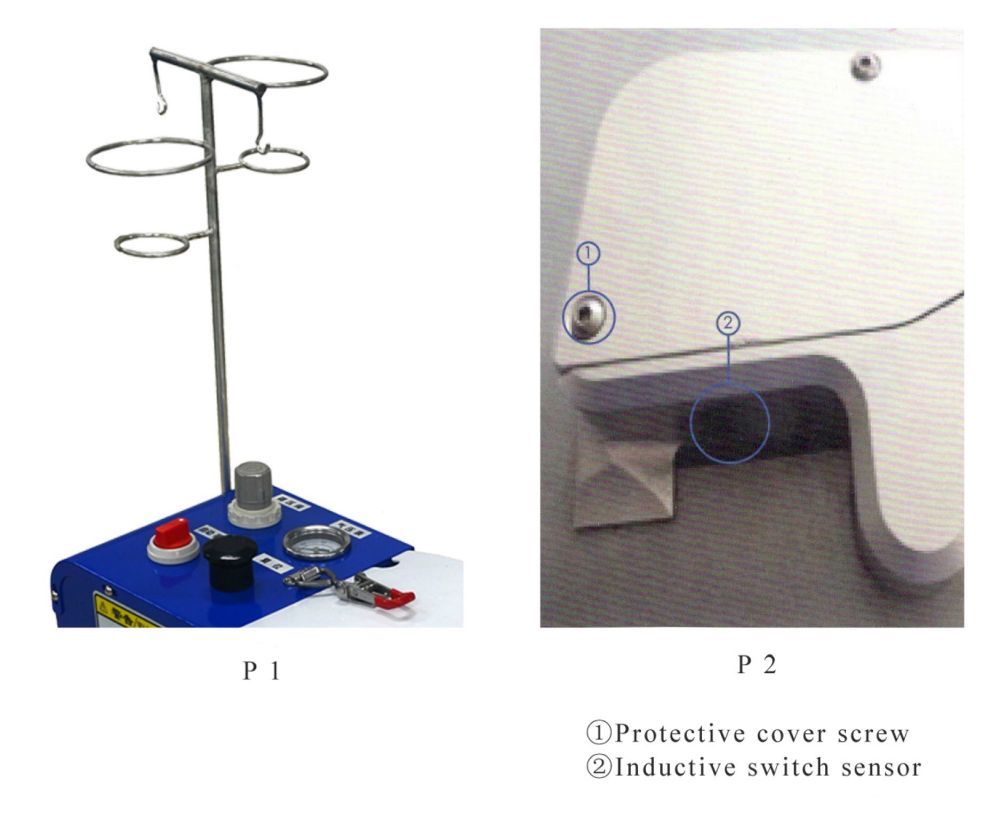
6. Stand and Fixation
6.1 P1 depicts the vaccine bottle stand. This stand is fixed and do not need adjustment.
6.2 P2 is where the head of a chicken is placed for injection.
7. Installation of Needle
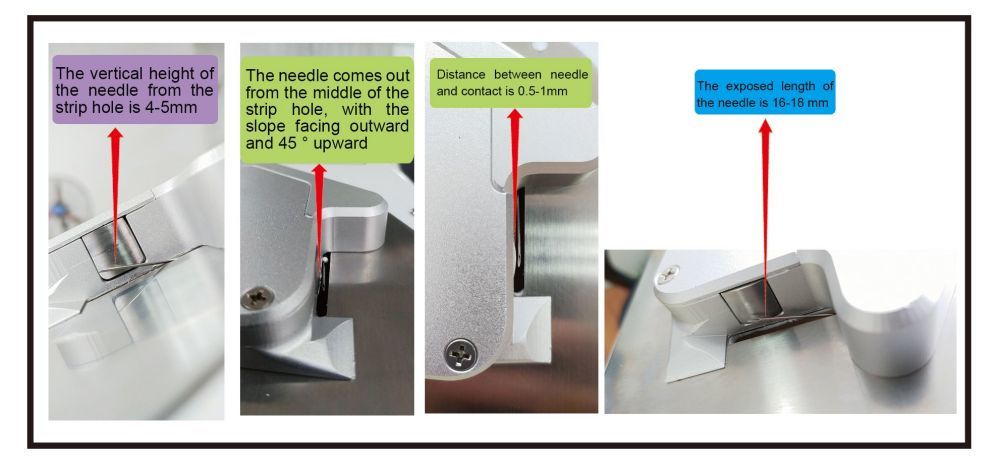
7.1 The vertical height of the needle from the strip hole is 4-5mm.
7.2 The needle comes out from the middle of the strip hole, with the slope facing outward and 45°upward.
7.3 Distance between needle and contact is 0.5-1mm.
7.4 The exposed length of the needle is 16-18mm.
8. Feeding the Injector
8.1 Release the screw on piston bar.
8.2 Push piston bar several times to draw in vaccine into the injector.
8.3 Fix the screw on piston bar.
8.4 Push the piston bar again several times to push out the air inside the injector.
8.5 Install the injector onto the needle seat, fix the injector firmly,the injector is ready for usage.
9. Dosage Correction
9.1 Connect the physiological saline, inject the measuring cylinder for 50 times continuously, and place the measuring cylinder horizontally to observe the dosage;
9.2. For dosage adjustment, loosen the ① first; Turn the ② counterclockwise to increase the dosage; Turn the ② clockwise to reduce the dosage.
9.3. After the dosage adjustment, tighten the ① slightly.
Note: The ③ must be completely reset each time to ensure the accuracy of injection dosage.

10. How to Inject with the Device
Ensure the needle is adjusted to proper length to avoid penetrating delicate tissues.
We recommend to inject at the back of the chicken neck (midway between head and chest), the length of the needle would preferably touch subcutaneous tissue of the chicken, or between derma and muscle layer.
The needle need to reach sufficient depth during the vaccination, else the vaccine would spill over.
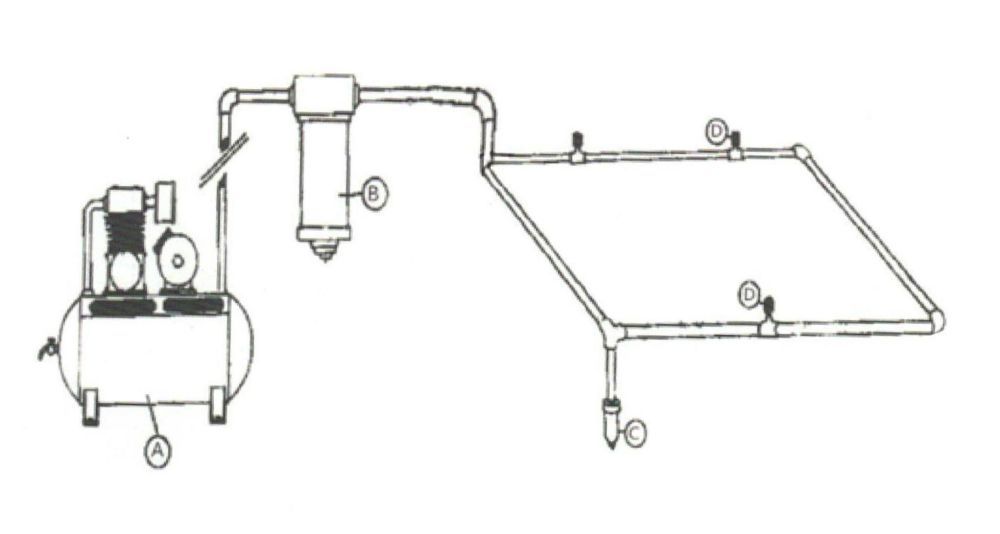
11. Regarding the Gas System
11.1 To ensure the gas line is sealed tightly, we recommend using trusted brand air tubes to connect the device.
11.2 Clean the pipes before connecting, the system need to be free of irrelevant substances.
11.3 Long or steep lines may lower pressure of the gas in the system, we recommend the following way of placing the tubes shown under this page.
11.4 A drain pipe would be desirable to ensure no water is held up in the system.
12.Trouble Shooting
| Problem | Solution | |
| 1 | Dosage of the injector is faulty | Replace the O-ring or valve washer, check feeding and discharge valves, add lubricant to piston bar |
| 2 | Injector load preset not working | Reassemble the device to see if the trouble persists |
| 3 | Total Load Tracker not working | Check if the tracker is connected to the device, replace the tracker if the trouble persists |
| 4 | Air leaking | Find and replace the leaking tube |
| 5 | Air cylinder leaking | Replace the gas cylinder |
| 6 | Injection slants | Replace the fixation seat |
Note:
1. If not used for a long time, the injector may not be able to draw in vaccine, as the rubber on the connector and valve got stuck together, simply separating them would fix the problem. If the trouble persists, clean the connector thoroughly.
2. When cleaning or replacing the components, fix the seals tightly to prevent leaking.
13.Maintenance
13.1 After daily usage, clean the device first with alcohol. then clean with distilled water.
13.2 Check if the screws on the piston bar are intact.
13.3 Check if the circlets on the piston bar are in good shape, replace the circlets if broken.
13.4 Check the liquid reflux valve are intact, replace if broken.
13.5 The pipe have to be bubble free during injection, change the pipe if necessary.
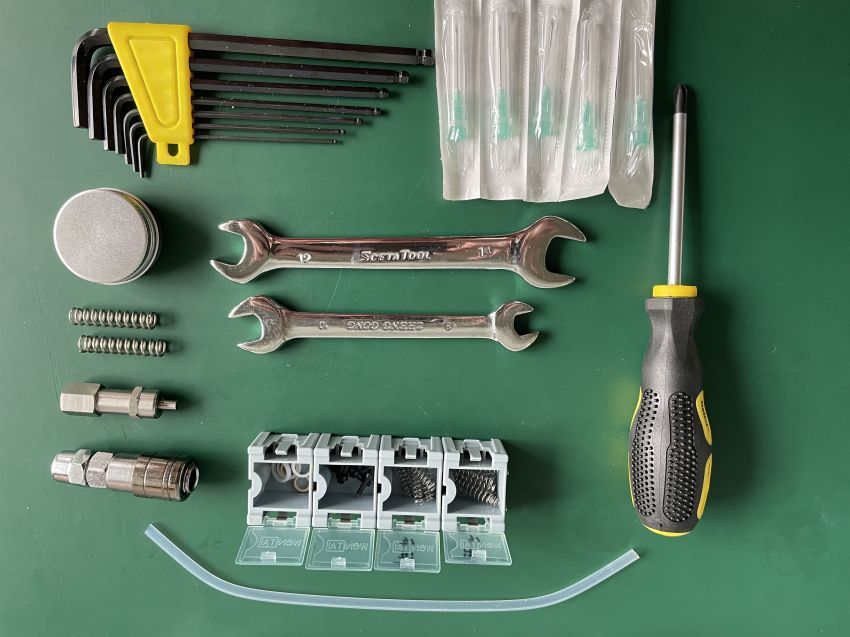
DETAILED PHOTOS
 |
 |
 |
 |
 |
 |
 |
 |
Online Message
Address :
No.31 Xuehai Street, Bengbu City, Anhui Province, China
E-mail : fangxudong@regaldz.com
Service Hotline :
©2022 ANHUI REGAL ELECTRONIC TECHNOLOGY CO., LTD SEO 【Business license】
Online Message